 It is always fun building your own stuff …………….
I never considered myself a builder. However, I have fun when it comes to building something to trap bugs. Recently, I have a chance to build one that is easy to assemble and at the same time stable. So let’s start shopping for it!
You can get all the following items in most of the hardware shops.
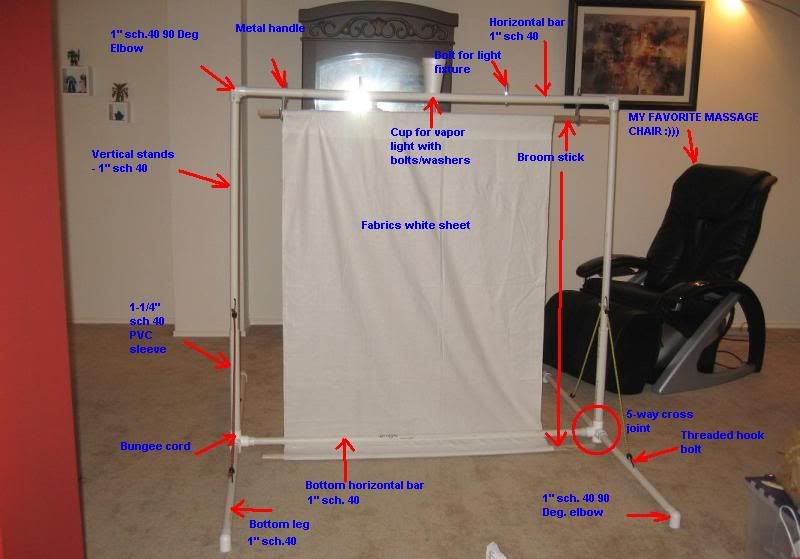
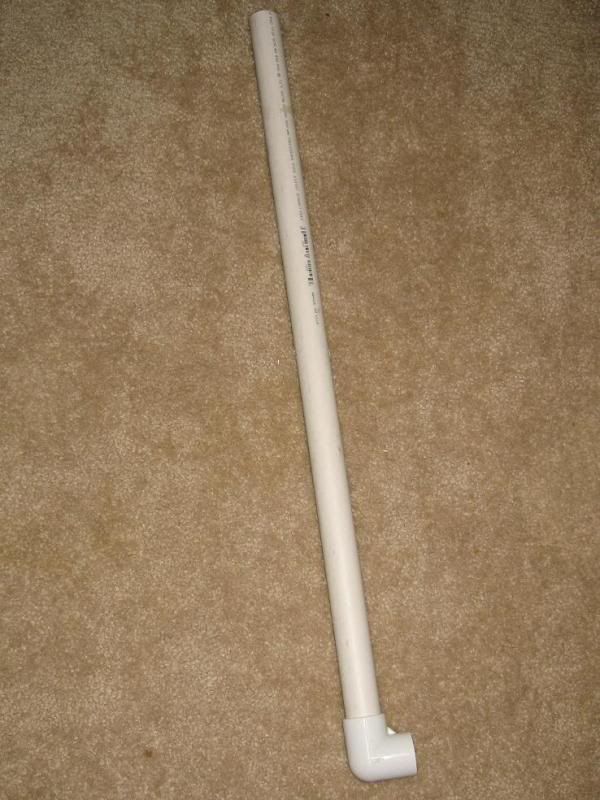
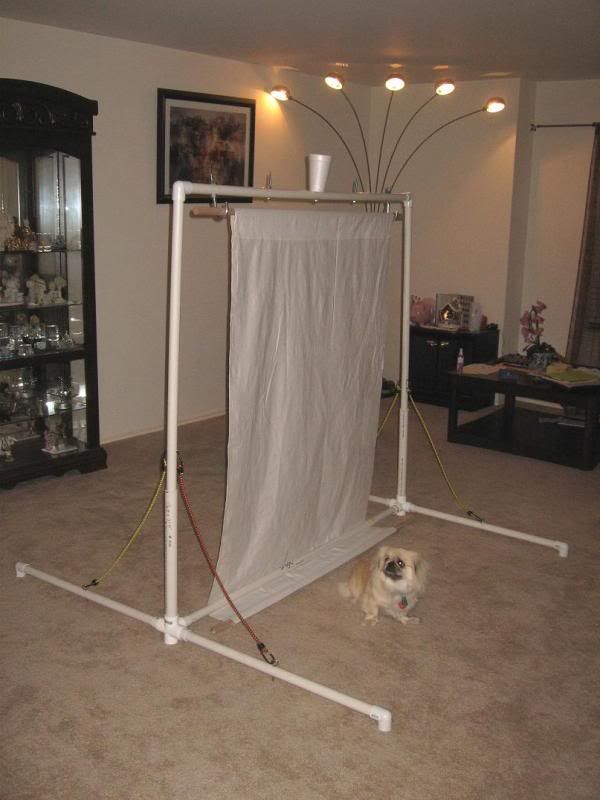
Three 1” x 10’ sch.40 PVC pipe - Each pipe was cut into half in the shop. These form the major part of the structure for the bug trap, Two horizontal bars, top and bottom. Two vertical bars as stands, and the other two were further cut into half and form the four horizontal legs;
Six 1” sch.40 90D elbows - Four of these will be used as the “legs” and the other two will connect the top horizontal bar to the two vertical stands of the structure;
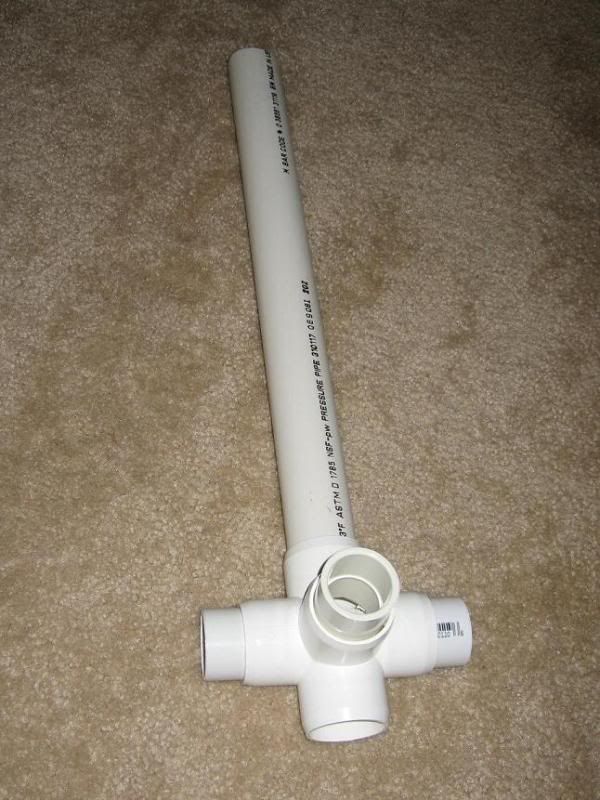
Two 1-¼” 5-way cross - These are the two most important joints for the structure. It joints the vertical stand to both horizontal legs. Both 5-way cross connected by a 1” x 5’ sch.40 PVC pipe to form the bottom bridge of the structure – bottom horizontal bar;
Two 1-¼” x 3’ PVC sch.40 - These form the “sleeve” to the two 1” sch. 40 vertical stands for easy assembly. Previously, this has been the worst part to take apart so this is a major upgrade right here ha!;
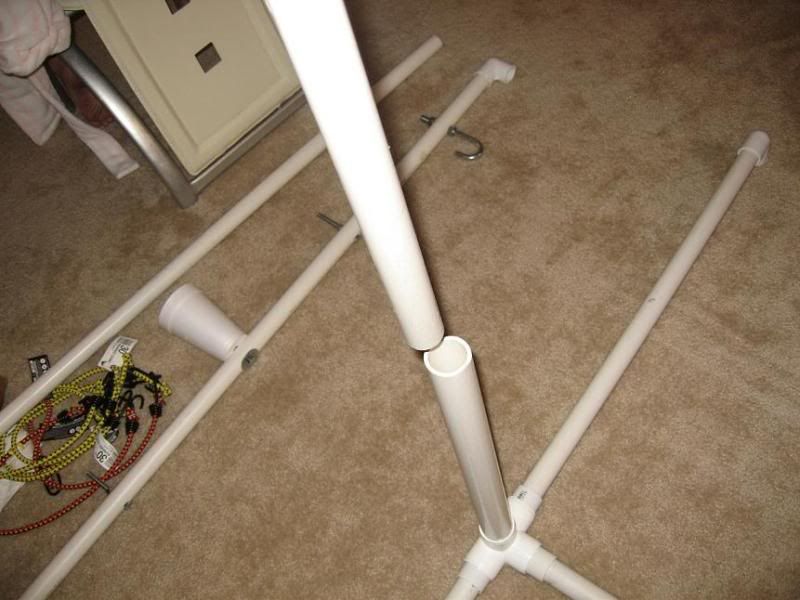
Six 1” PVC sch.40 coupling - These allow transition of 1-¼” to 1” sch. 40 at the Two 1-¼” 5-way cross;
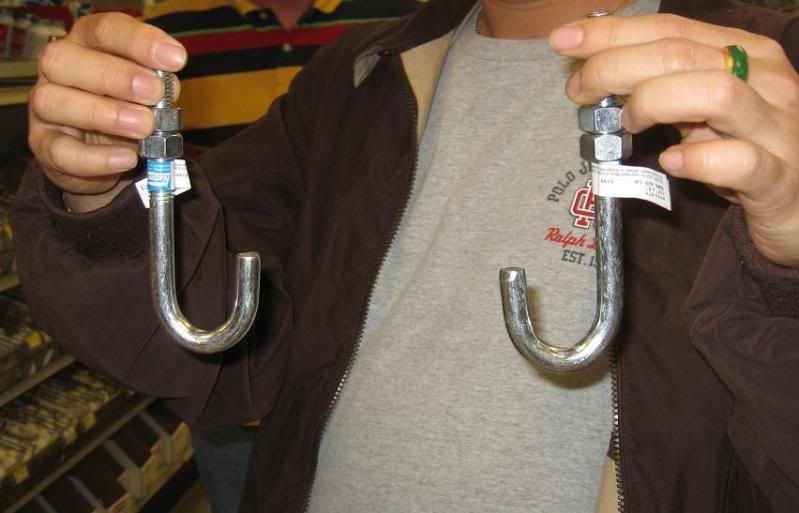
Two threaded metal handle (Hook) + nuts – These are screwed to the end of top horizontal bars with hook facing down to hang on the broom/ white sheet;
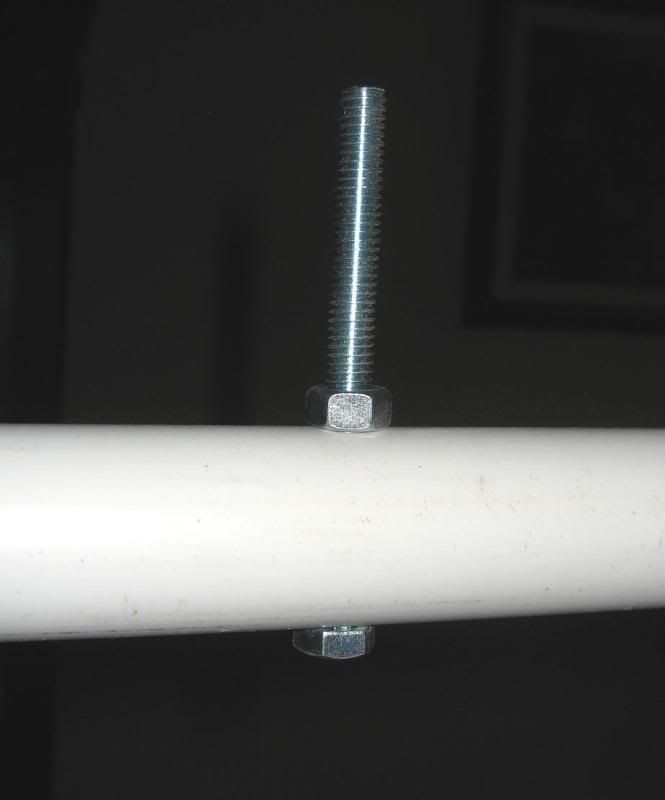
Two threaded hex bolts and nuts – These are screwed to the top horizontal about 1 foot away from the center and support the bungee cord which hang the light fixture;
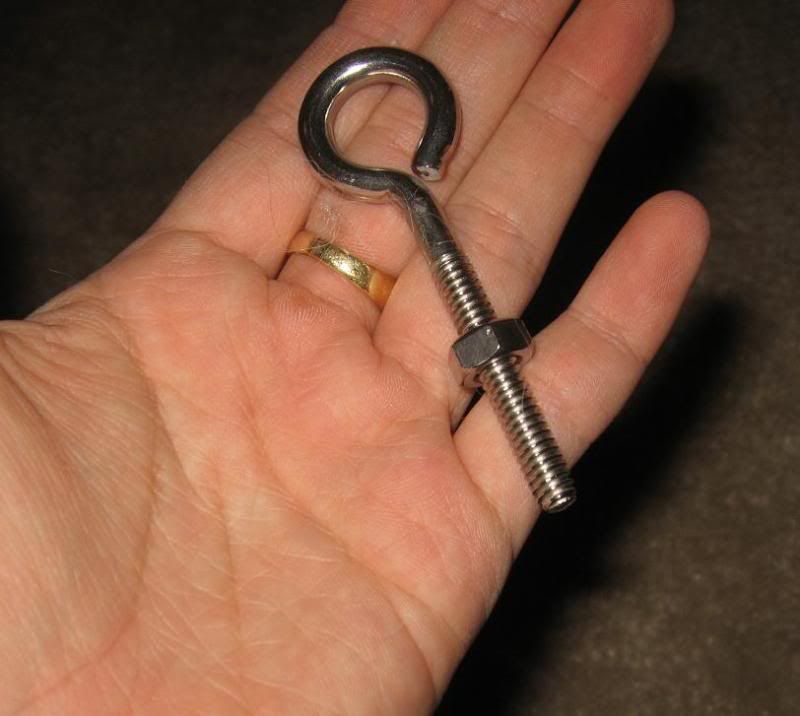
Four hook bolts and nuts – These are screwed in the mid-point of all four legs for easy bungee cord hooking;
Six bungee cords (around 30” long) – Two of these to hang the light fixture while the other four to provide the stability of the structure by connecting the cord between the vertical stands and legs;
One hex bolt + 2 flat washers + bolt + cup – These are screwed at the center of the top horizontal bar with washer plate form a support to hold the cup steady. The cup is used to hold mercury vapor light; 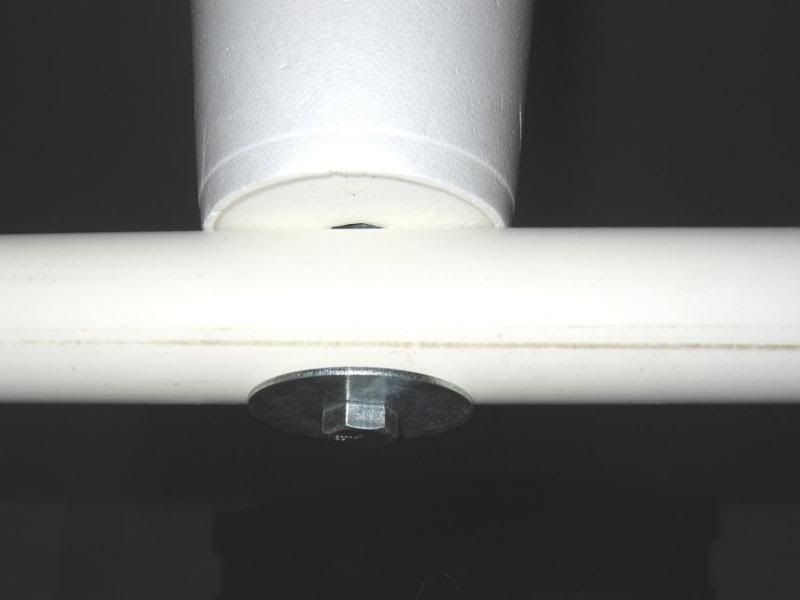
Two wooden broom – To spread the white sheet. One is hanged by the metal handle and the other at the bottom as weight to keep the sheet from flapping around by the wind;
Two 5’ x 5’ white color fabrics – one to be hang vertically and another at the bottom to collect bugs that fall from the vertical sheet;
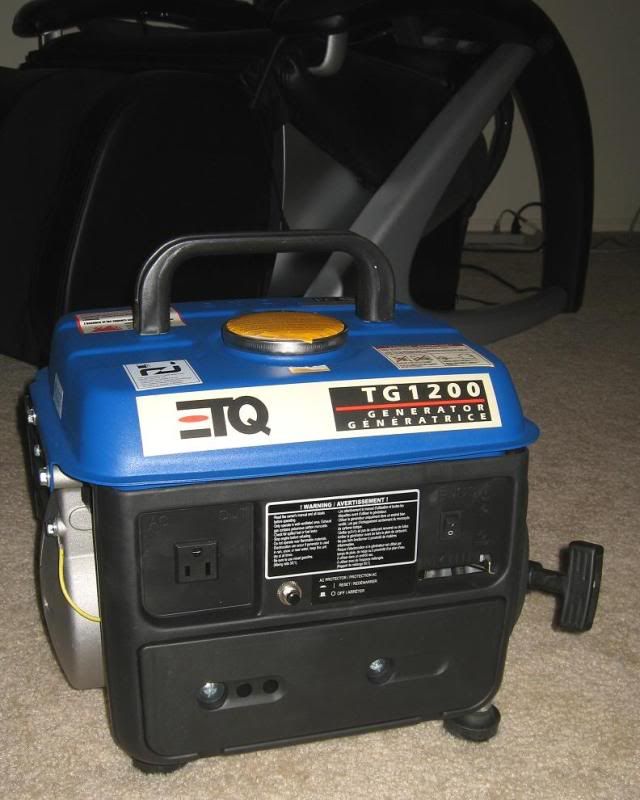
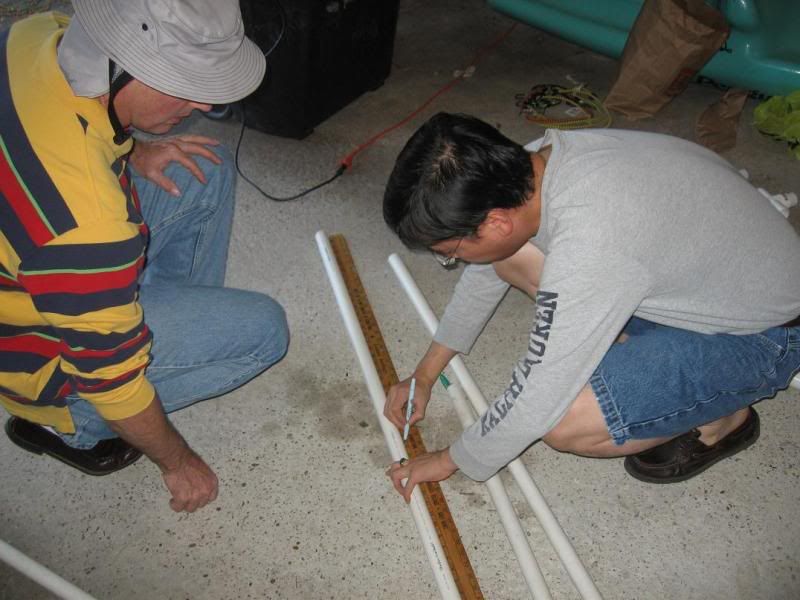
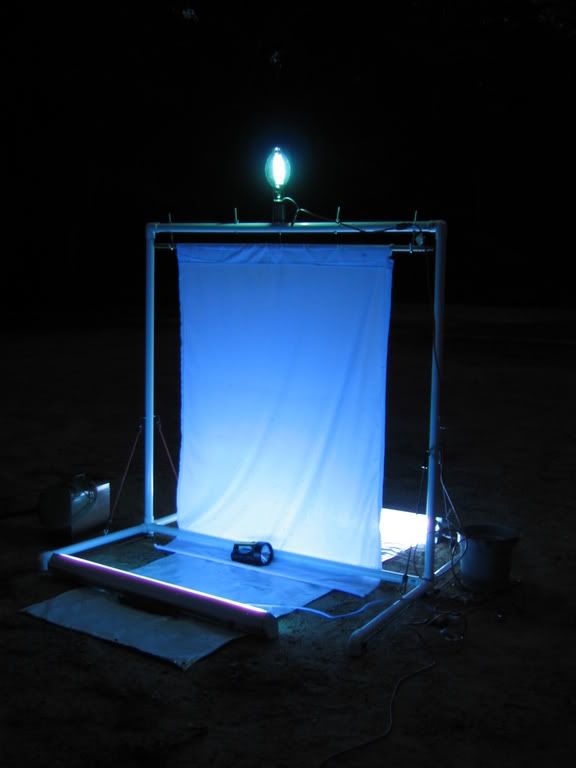
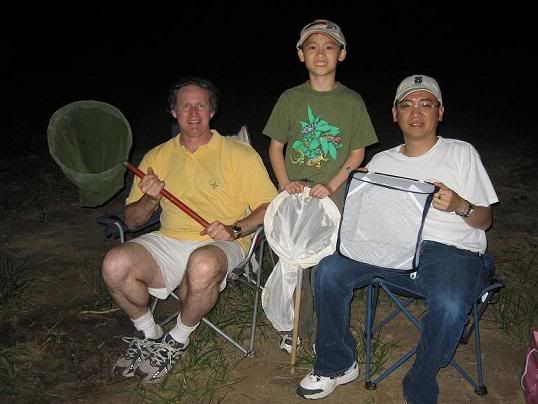
Once the basic materials are ready, it is time to ship for the electrical stuffs. First of all is the source for attracting bugs, yep that is the blacklight. As my set-up allows hanging two light fixtures, I am going to need four white blacklight and two light fixtures.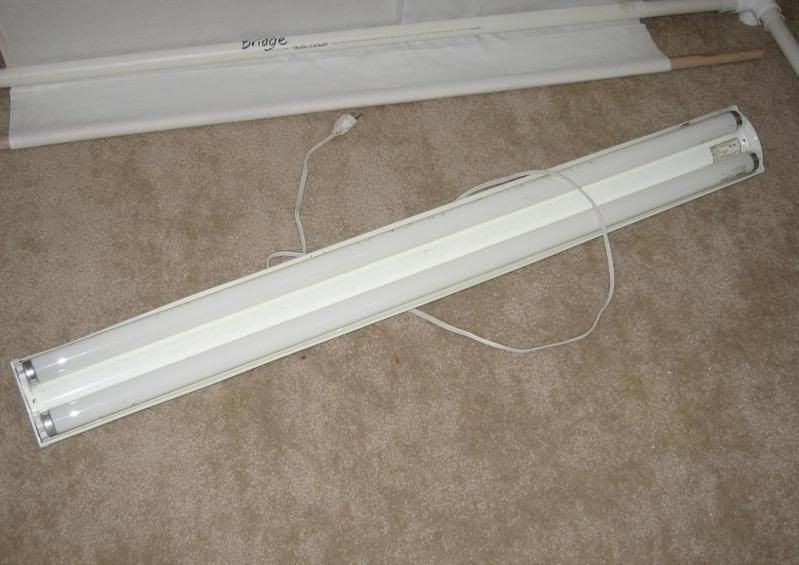 I ordered them from a light bulb company here together with the fixture. Both will be hung on the thread hex bolt on each side of the sheet to maximize the bright area on both sheets. Shopping for vapor light could be tricky. http://www.bioquip.com/ carries 175W mercury light bulb with proper ballasting but it is expensive and could cost more than $200. The other alternative is to get a self-ballasted vapor light which is much cheaper ($20-$40) but the bulb can get very hot and break if comes in contact with rain water, so a rain shield for this type of vapor light bulb is recommended. A simple light set up accessories is used together with the vapor light. After that, we need to power the light. Unless you plan to set-up the light trap closer to an electrical power source (such as near the house), a power generator is required, especially when collecting deep inside the forest. A massive and heavy generator (3000 Watt or above) that cost nearly thousand bucks is “over-powered” to just lighting up the blacklight. I bought a 1200watt generator costing me only $125! So wallah!! We have the stuff ready. Next is to drill a few holes on the PVC pipes where the bolts will be tightened on. As long as the hole allows the bolts to get through it will be sufficient. So we have almost everything ready. I would also recommend getting a few flash lights, extension cord with 5-6 plug holes, some camp chairs and some drinks, and then all we have to do is just sit and enjoy!!!
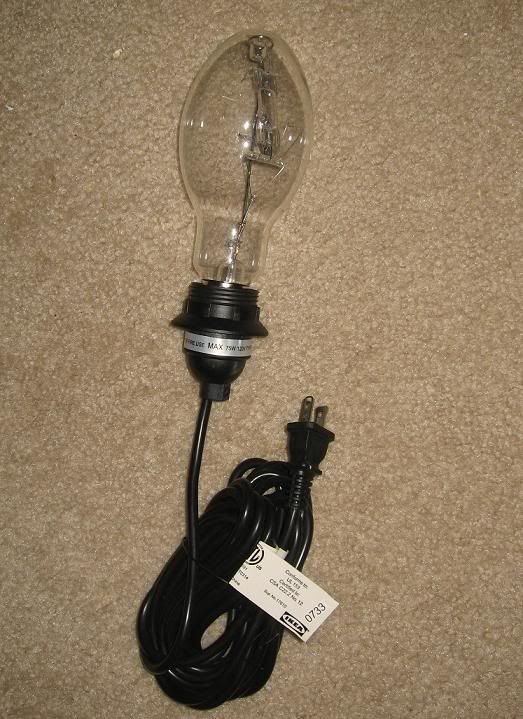
Once the basic materials are ready, it is time to ship for the electrical stuffs. First of all is the source for attracting bugs, yep that is the blacklight. As my set-up allows hanging two light fixtures, I am going to need four white blacklight and two light fixtures.
I ordered them from a light bulb company here together with the fixture. Both will be hung on the thread hex bolt on each side of the sheet to maximize the bright area on both sheets. Shopping for vapor light could be tricky. http://www.bioquip.com/ carries 175W mercury light bulb with proper ballasting but it is expensive and could cost more than $200. The other alternative is to get a self-ballasted vapor light which is much cheaper ($20-$40) but the bulb can get very hot and break if comes in contact with rain water, so a rain shield for this type of vapor light bulb is recommended. A simple light set up accessories is used together with the vapor light. After that, we need to power the light. Unless you plan to set-up the light trap closer to an electrical power source (such as near the house), a power generator is required, especially when collecting deep inside the forest. A massive and heavy generator (3000 Watt or above) that cost nearly thousand bucks is “over-powered” to just lighting up the blacklight. I bought a 1200watt generator costing me only $125! So wallah!! We have the stuff ready. Next is to drill a few holes on the PVC pipes where the bolts will be tightened on. As long as the hole allows the bolts to get through it will be sufficient. So we have almost everything ready. I would also recommend getting a few flash lights, extension cord with 5-6 plug holes, some camp chairs and some drinks, and then all we have to do is just sit and enjoy!!! 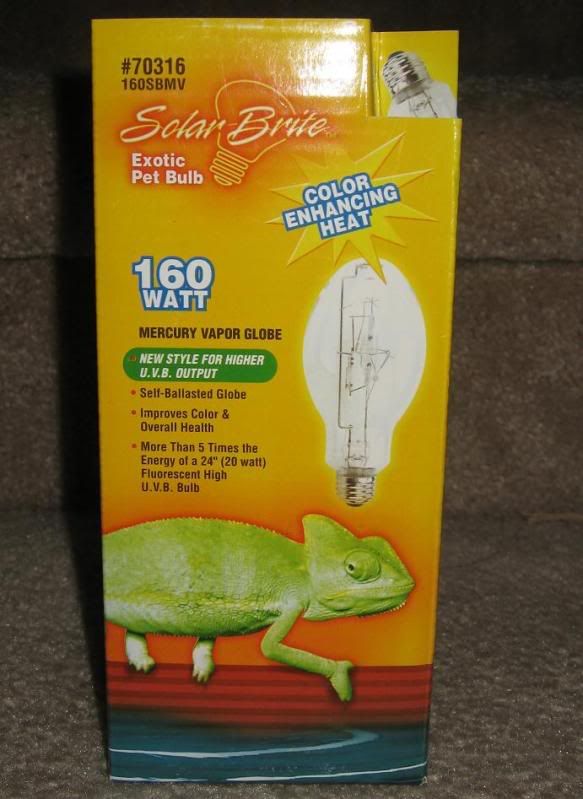


No comments:
Post a Comment